Our Guide to Caring for Your Art & Antiques
Part 1: Caring for Silver
Part 2: Caring for Wood
Part 3: Caring for Framed Artwork
Your Thrilled Kitty treasures will give you pleasure and inspiration for many years to come, and with just a little care and attention you can keep them looking their best. If you are new to the world of antiques and artwork, in this guide we offer you some general advice on what to do (and, more importantly, what not to do!) with your vintage and antique pieces. And even if you are an experienced collector, we hope you might still find a few of the tips we’ve amassed over the years useful.
Silverwork and Silver Jewellery
What is tarnish?
Silver can become tarnished – that is, become dirty-looking or discoloured – due to exposure to oxygen or sulphur. You can think of tarnish as a dull uneven film over the surface of the piece, in colours varying from yellowy-golds to deep dark greys. Fortunately silver is an easy material to maintain and restore if you know a few simple tricks.
Bear in mind, however, that there is a fine line between tarnish and patina, and overzealous cleaning can do more harm than good. Being a relatively soft metal, silver will acquire tiny marks from use and the finish will soften and mellow over the years. This is patina, something which should be prized as it is impossible to replicate artificially. You don’t want to polish this away!
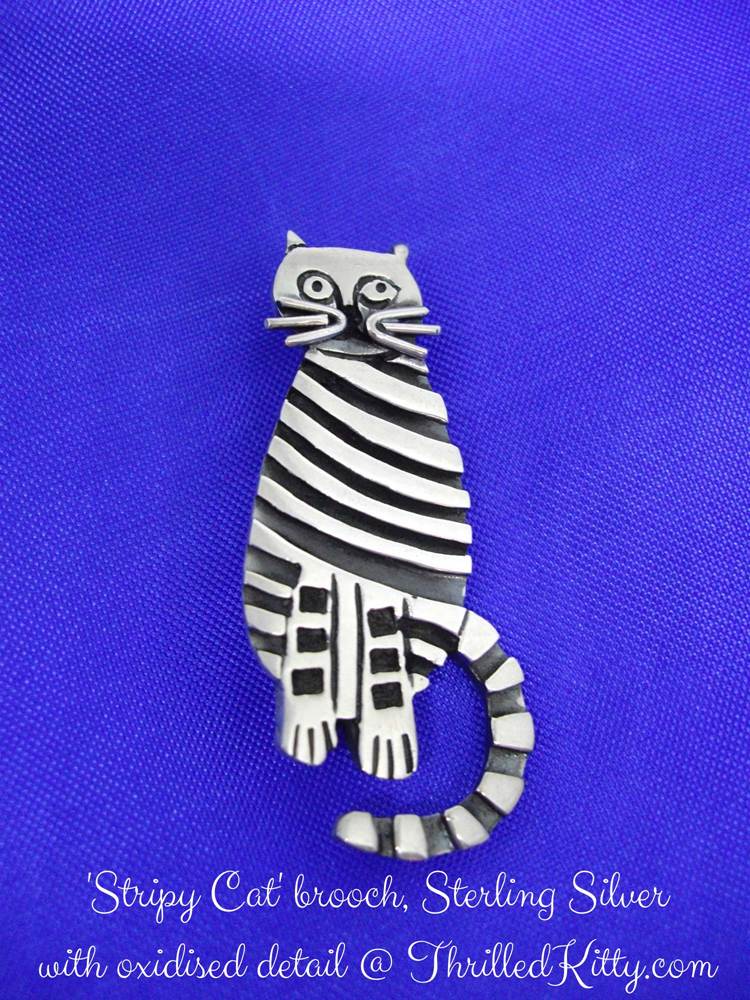
In some cases silversmiths will deliberately oxidise areas during the casting of a piece to make them stand out. For example, the dark stripes on our adorable Stripy Cat brooch are created using this process, and assiduous polishing to remove them would only lessen the piece by removing contrast.
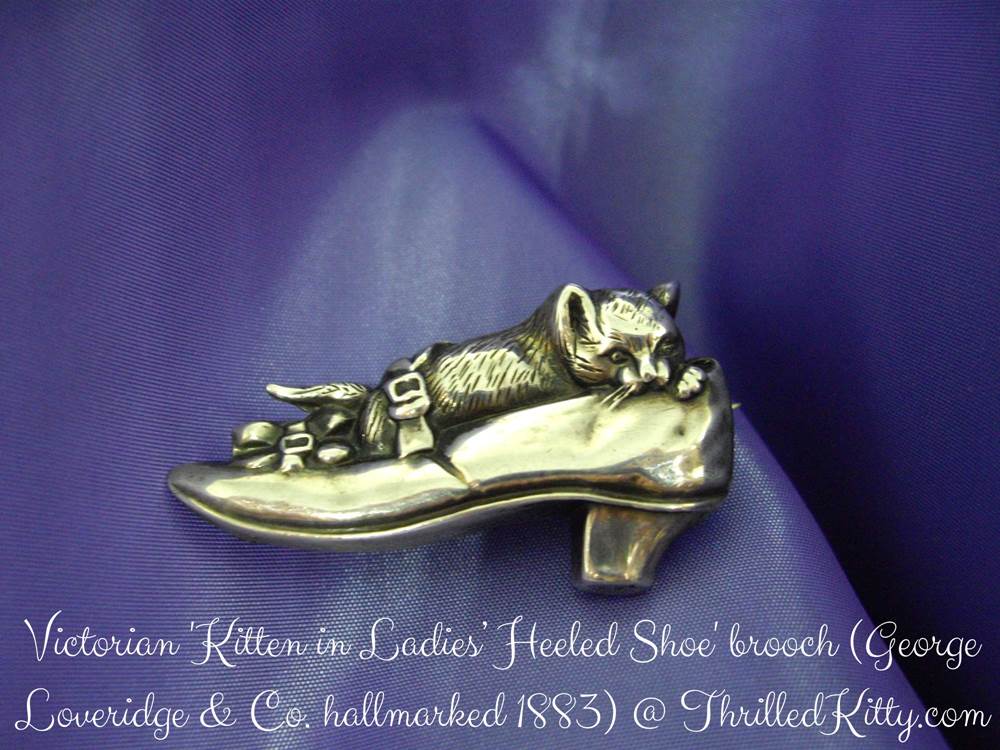
The charming late-Victorian Kitten in Ladies’ Heeled Shoe brooch (crafted by George Loveridge & Co. and hallmarked 1883) is a perfect example of patina and beneficial tarnish. You can see how, over the decades, the finish has taken a lustrous softness and oxidation has occurred in the deeper areas of the casting, which serves to highlight the intricate detail. A thorough clean and polish of this piece would greatly detract from its historical character, and so we recommend leaving it untouched.
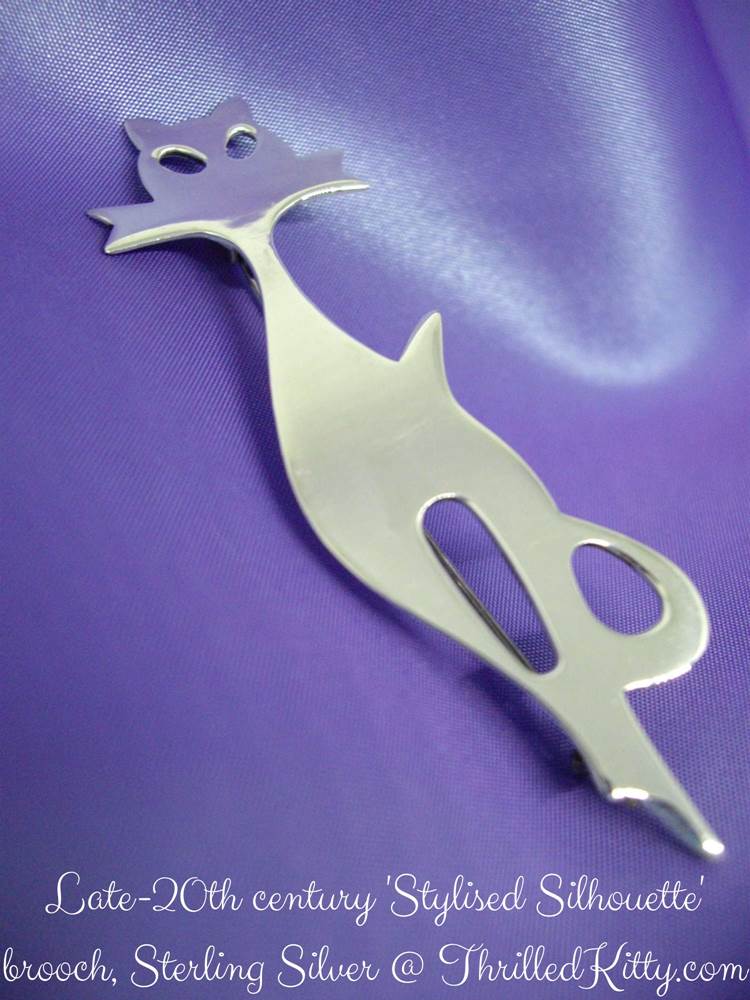
And compare these pieces with the eye-catching sheen of the stylish late-20th century Stylised Silhouette brooch. This is a piece that will benefit from occasional polishing to maintain its beautiful mirror-like shine.
As you can see, tarnish and oxidation can sometimes be a good thing, so don’t be too eager to break out the silver polish!
Preventing tarnish
You can save yourself much of the work of cleaning and polishing silver if you take a few simple preventative steps to avoid tarnish forming in the first place.
Perhaps surprisingly, the easiest step is to use your silver frequently: regular handling significantly reduces the formation of tarnish thanks to the action of natural oils in your skin. A gentle rub with a soft cotton cloth should be enough to remove fingerprints if you notice them.
Avoiding frequent exposure to everyday oxidising elements is also helpful. Contact with naturally sulphur-containing materials (such as wool) will speed the formation of tarnish, as will household cleaning products, cosmetics and hair products, chlorinated water, perspiration and direct sunlight.
If you are storing unworn pieces for some time, you have several options to reduce the effect of tarnish-forming oxygen by limiting moisture and airflow around them. They can be stored in an airtight box (although don’t leave silver in direct contact with plastic); you can purchase anti-tarnish bags and silver storage pouches impregnated with an anti-tarnish agent; you can wrap them in Silvercloth; or you can add an absorbing agent to your jewellery box, such as special anti-tarnish paper strips, silica gel bags or even a simple piece of chalk which will help to absorb moisture and chemical residues.
How to clean silver
A gentle rub with a soft cotton cloth to remove fingerprints is often all you need to do to care for regularly used silver items. Remember that silver is easy to scratch because of its softness so don’t use any cloths that feel abrasive; this includes some types of kitchen towel or tissue, which contain fibres that can potentially leave micro-scratches.
The next stage is a silver polishing cloth which is impregnated with a cleaning solution and anti-tarnish agents. These will usually be perfectly sufficient for removing light tarnish and bringing a good shine to the metal. Simply rub the cloth gently over the item, using long back-and-forth strokes rather than a circular rubbing motion where possible, and you should see the cloth darkening and the tarnish coming away. If there are any semi-precious stones set into the piece be sure to avoid them, and be especially careful not to run the cloth over porous materials such as pearl, shell or coral. When an area of cloth has turned black move on to a new area, and replace the cloth when no useable clean areas remain.
Once the tarnish is removed use a soft cotton cloth to buff the piece to restore the mirror shine, again using the long back-and-forth motion (polishing cloths are sometimes double-sided so you can polish and buff with the same cloth).
If this proves insufficient, or if tarnish has built up noticeably, it may be time for a more thorough cleaning.
First a warning: you will find a myriad of professional products and recipes for home-made solutions on the internet, but be cautious with any cleaning product, ‘natural’ or otherwise. You may see scrubs made with baking soda paste or even toothpaste as recommended cleaning agents, and while they may work with some types of jewellery we strongly advise against using them with silver as they are abrasive and may scratch the finish.
Never immerse any jewellery that is set with porous materials (such as pearls, abalone, shell or coral) or softer gemstones (including turquoise or opal) as they can be seriously damaged by cleaning solutions. Even harder stones are at some risk, as the solution can penetrate under settings and loosen any glues or sealants that have been used. And do not use cleaning solutions on silver with intentionally oxidised accents as they will be partially or wholly removed, spoiling the effect (as discussed above); just lightly use a polishing cloth on these if necessary, being careful not to work the cloth into the oxidised areas.
A note here, too, about ultrasonic cleaners, which use high-frequency sound waves to agitate a cleaning solution. These have become popular and affordable in recent years but many people are unaware that they can be potentially harmful to certain types of jewellery. Many gemstones – particularly stones such as lapis, but including even hard stones such as diamonds – are liable to contain microscopic flaws, called inclusions, which can be affected by the cavitation process these cleaners use, which in the worst case can cause them to crack or even fragment. They are fine for cleaning silver, gold and platinum (though not tungsten), but it is unwise to risk putting anything set with gemstones into them. Consider taking such pieces to a professional jeweller for cleaning.
If you are certain you want to proceed with deeper cleaning, your first option is simply to use warm water with a mild soap (free of ammonia and phosphates) along with a soft cloth to gently wash the tarnish away (again remember to avoid the circular scrubbing action), before rinsing and drying and moving on to a polishing cloth.
If this fails, you can try the internet favourite aluminium foil process: line a small basin, pan or dish with aluminium foil (shiny side up), pour in very hot water, and add a tablespoon or two of baking soda, stirring it to make sure it has all dissolved. Some ‘recipes’ suggest adding a little salt and distilled (white) vinegar too to speed and intensify the process. Now carefully drop in your silver items and leave for around 10 minutes; you should find that the chemical reaction draws the tarnish from the silver to the aluminium. You can now rinse the items and gently buff with a soft cloth. This not only an effective tried-and-tested method, but is also an inexpensive and relatively environmentally friendly option when compared to some of the ready-made cleaning solutions you can buy.
Our preferred method, and the one we recommend, is the museum-standard approach of a reusable electrolytic cleaning plate (such as the Qwicksilver) along with hot water and old-fashioned washing soda (better known in the UK as soda crystals, which you will usually find tucked away on the lower shelves of the laundry section in supermarkets). You place the plate into a sink or basin, add two heaped tablespoons of soda crystals and a little boiling water from the kettle to dissolve it, then top up with very hot water and add your items.
The action of the soda crystals dissolving on the plate releases bursts of hydrogen which are strong enough to draw the tarnish from the silver, but far too weak to affect the silver itself. The process should take about 15 seconds, after which you rinse and gently dry the silver with a soft cloth, and then rinse the tarnish from the plate with soapy water so it is ready for the next use.
There is a small initial outlay for these electrolytic plates but they should last a lifetime and can be a worthwhile investment if you have a lot of tarnished jewellery or silverware that needs cleaning (it can also be used to clean other metals such as gold, bronze and brass, but you must never mix different types of metal at the same time). We use them at Thrilled Kitty as part of our cleaning and restoration process.
Treen and Wood
There’s no need to regularly polish treen and wooden ornaments – a gentle buff with a soft dry cotton cloth is usually all that is needed. Dècoupaged, lacquered or varnished wood can respond unpredictably to cleaning products, and the finish can potentially be ruined.
If you have a plain wood item that you feel has dulled and would benefit from a polish, however, you can use a very sparing application of beeswax or another wax polish such as Fiddes. Always use less than you think you need, and test on an inconspicuous area such as the base before working on the whole piece.
An antiques trade trick with tinned waxes is to always leave a piece of soft cotton cloth material in the top of the tin to soak up a trace of the polish, and use this for most of your polishing requirements – it will usually contain enough of the product to bring a shine without overloading the grain of the wood.
Adding too much polish to wooden items takes a lot of buffing to remove and can leave the surface dull and tacky, attracting dust – as tempting as it is to be generous in application you really need very little, as most of the result is achieved by the process of buffing. Apply polish very sparingly, leave for around 10 minutes, then buff to a sheen.
Cleaning framed pictures
It is best not to clean the glass of framed pictures as part of your general household cleaning, as a quick wipe over with a cloth is likely to add as many smears as it removes. A light dusting of the moulding (the outer edges of the frame) using a cotton cloth is usually all that is required. If dust has collected in intricate areas of an ornate or carved moulding you can use a soft bristled brush (such as a paint brush or make-up brush) to remove it. If you have a large number of such frames, an air puffer or can of compressed air is a worthwhile purchase to speed the process.
If the glass does need cleaning because of noticeable smears or fingerprints, or if you have an old frame that has accumulated grime or thick dust, it is wise to remove it from the wall and place it on a firm but padded surface before tackling the job. Choose an appropriate glass cleaning product and cloth.
Firstly, though, be sure what sort of glass you are working with. In the majority of cases it will be standard 2mm or 3mm ‘float’ glass. In some cases bespoke framers offer the option of various speciality glasses which have UV protective or anti-reflective properties or coatings (you will likely know if you have such glass, as you will have had to pay a significant premium for it!) and you should speak to your framer for specific advice on cleaning products for these. Others may use acrylic or styrene facings instead of glass for weight and safety reasons. Acrylic in particular is very susceptible to scratching and chemical damage, so should be cleaned only with a very soft, damp cloth – even kitchen towel can cause tiny abrasions to this surface.
If you’re dealing with plain glass, however, you have a variety of safe options:
- You can use a proprietary glass cleaner but avoid anything containing ammonia as it can potentially damage your artwork.
- A 50/50 mix of white vinegar and water makes an effective natural glass cleaner; if you live in a hard water area you may want to use filtered, distilled or de-ionised water as the dissolved minerals can leave marks. Mix up the solution in a spray bottle to make it easy to store and apply.
- A 50/50 mix of isopropyl alcohol and de-ionised water is even better – large bottles of both can be obtained quite cheaply and have other uses around the home.
- At Thrilled Kitty we currently use ‘HG Window Cleaner’ diluted with de-ionised water for all of our glass cleaning, which is both ammonia free and pH neutral, making it much safer to use in proximity to delicate artwork.
A soft, lint-free cloth is the most suitable tool for the job, with microfibre being particularly effective. We find that a longer ‘pile’ of microfibre is often preferable to the smoother ‘peach-skin’ style cloths that are specifically sold for glass cleaning, as this fabric can create a lot of drag on the surface of the glass that makes it harder to use.
Be extremely sparing in your application of cleaning solution: don’t allow the fluid to run to the edges of the frame as it may cause softwood mouldings to swell, or it may get behind the glass and discolour the mount board; if the picture is on a flat horizontal surface you have much more control over the cleaning fluid than if it is on the wall.
If there are any hard dried marks on the glass you can carefully use a sharp edge such as a razor blade to remove them, but the glass scraper tools sold in any DIY store for removing paint from windows are ideal for this task and much safer. Work gently with the edge of the blade at a 45 degree angle to the glass – never use the point as you may leave scratches. Be sure that you are working with standard ‘float’ glass and not acrylic or Plexiglass, as the latter scratches very easily so you should never use a sharp implement to remove marks.
If you have a frame where dust has collected inside the glass, take a look at our framing guide for tips on how to disassemble the frame to clean it more thoroughly. If you are not comfortable with this, however, you can likely find a local frame-maker who will be happy to do the job for you for a small fee.
And if your cleaning inspires you to shift your picture to a new location, you might also be interested in our guide on how to hang your artwork.