Part 1: A Guide to Mounting and Framing
Part 2: The Framing Process
Part 3: How to Hang Your Artwork
Part 4: Advanced Framing Tips
How to Hang Your Artwork
Now that you’ve chosen your fabulous feline artwork and found the right frame, it’s time to get it on your wall!
As with selecting a frame, there is no definitive ‘right’ way to hang your pictures – it will depend on your room, your personal style and the type of art you are displaying. The best results come from following your intuition, but there are some approaches and basic principles that you can use to help guide you.
There are a few areas of your home where you need to be cautious of hanging valuable pictures, especially original works. The rising heat makes wall-space above and close to radiators unsuitable. Kitchens and bathrooms are also problematic due to ambient moisture, which can penetrate even a well sealed frame and cause a damaging build up of condensation. Watch for the way light hits your walls throughout the day – even the finest quality pigments will fade if frequently exposed to direct sunlight, and powerful halogen lighting can heat and dry out materials in very close proximity. Direct lighting can also cause glare from the glass which will reduce the visibility and impact of your art, unless you opt for expensive glass with anti-reflective qualities from a bespoke frame-maker. Try to avoid hanging pictures where any light source, natural or artificial, will strike it directly. Consider also the picture’s position relative to the viewer: will they be sitting or standing? Distant or close?
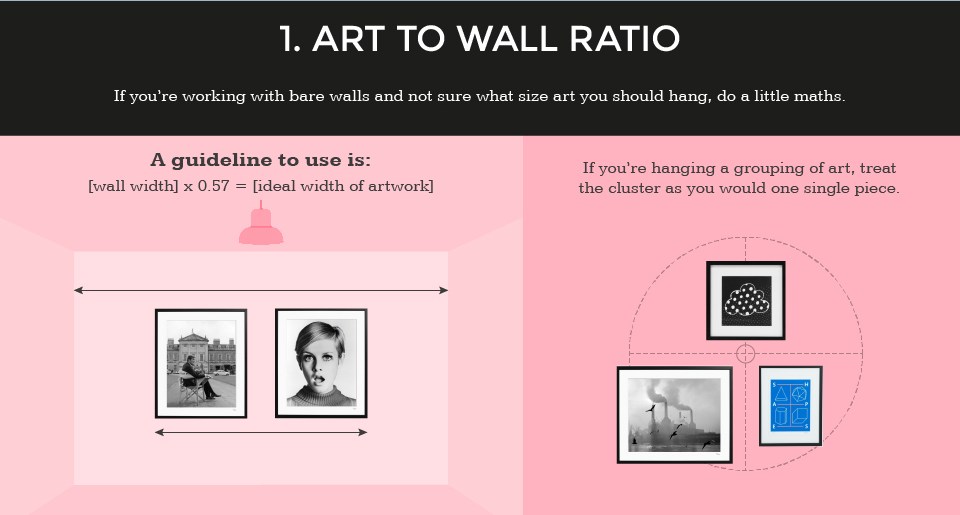
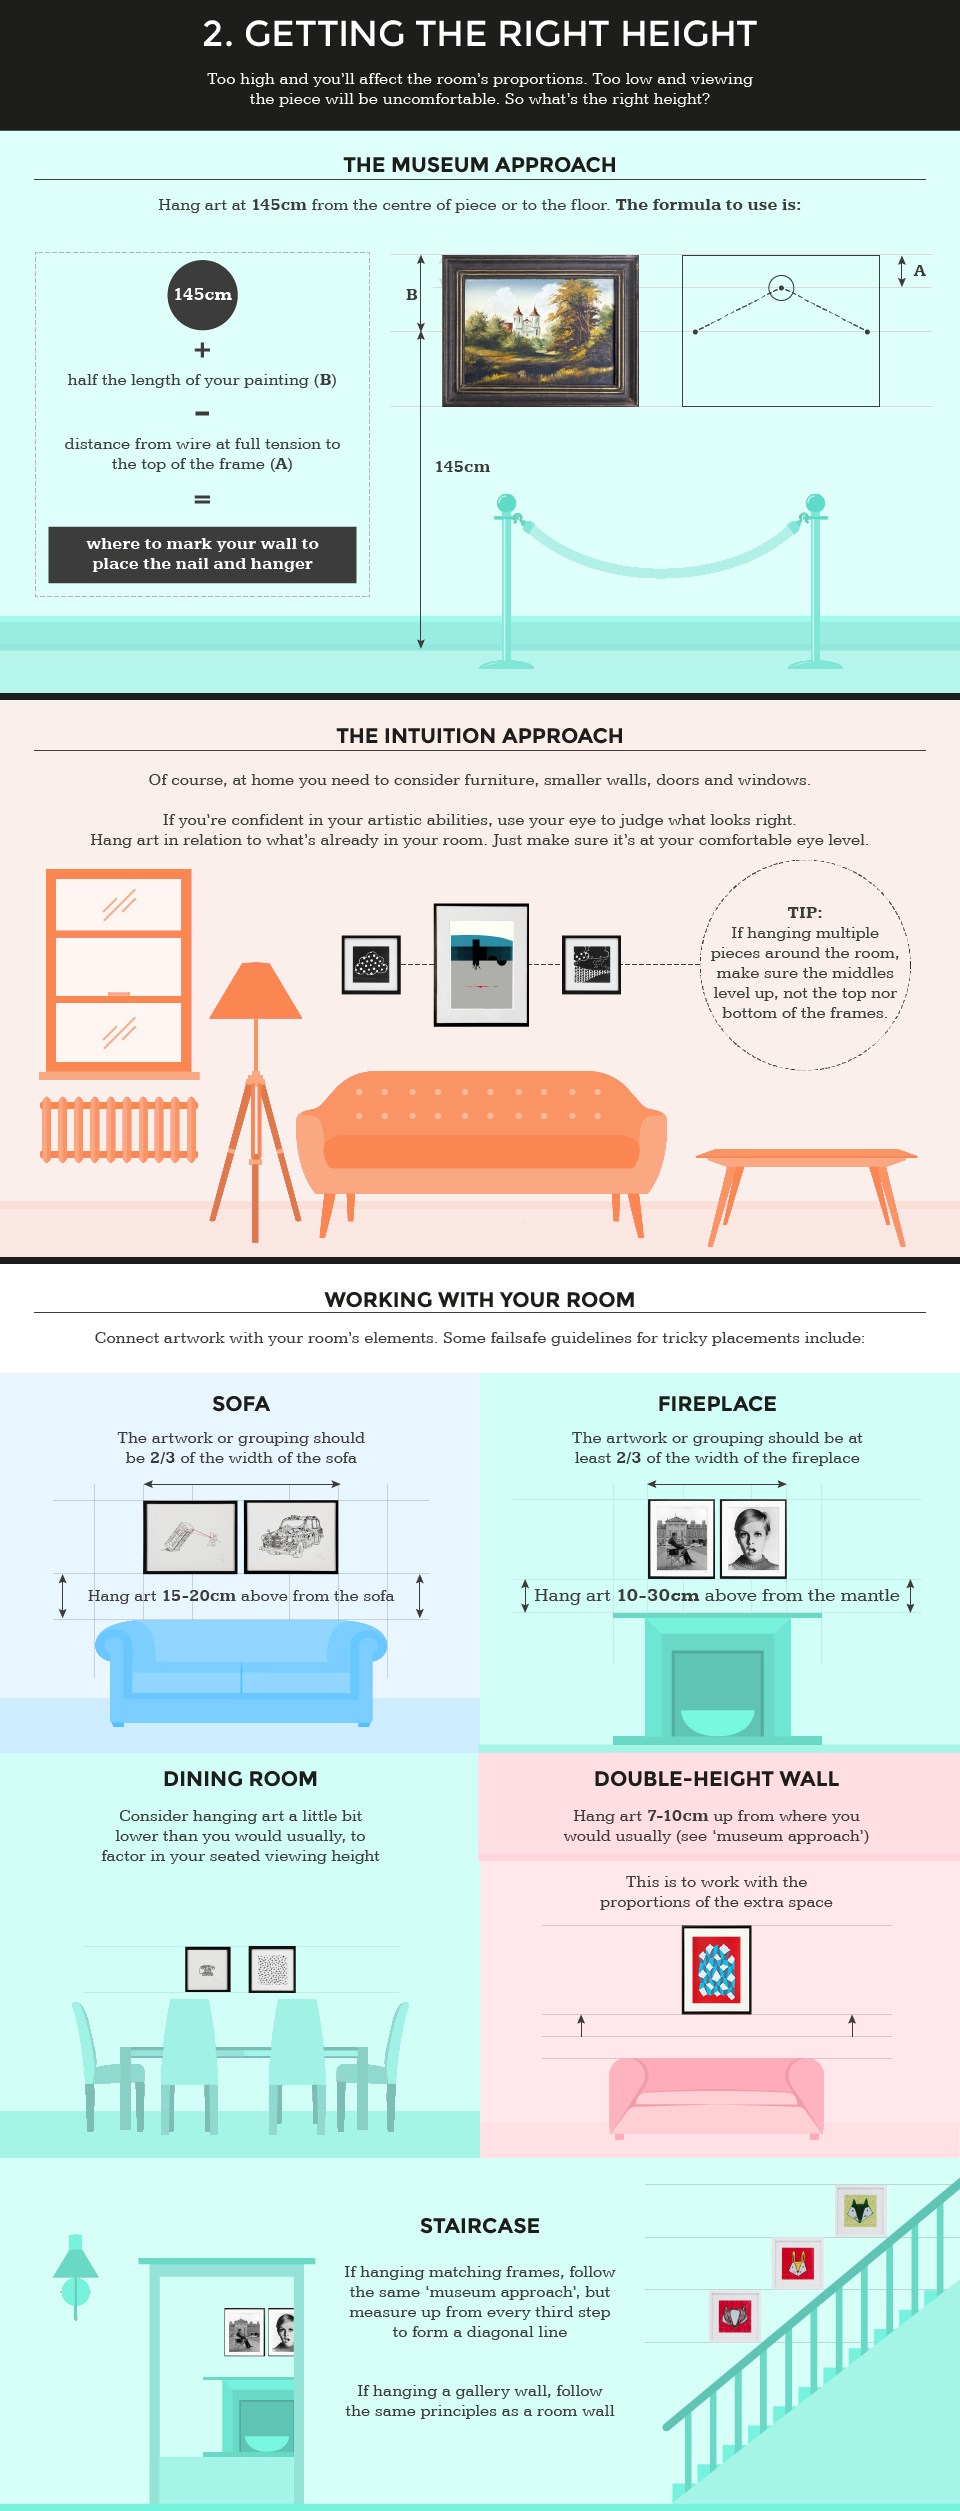
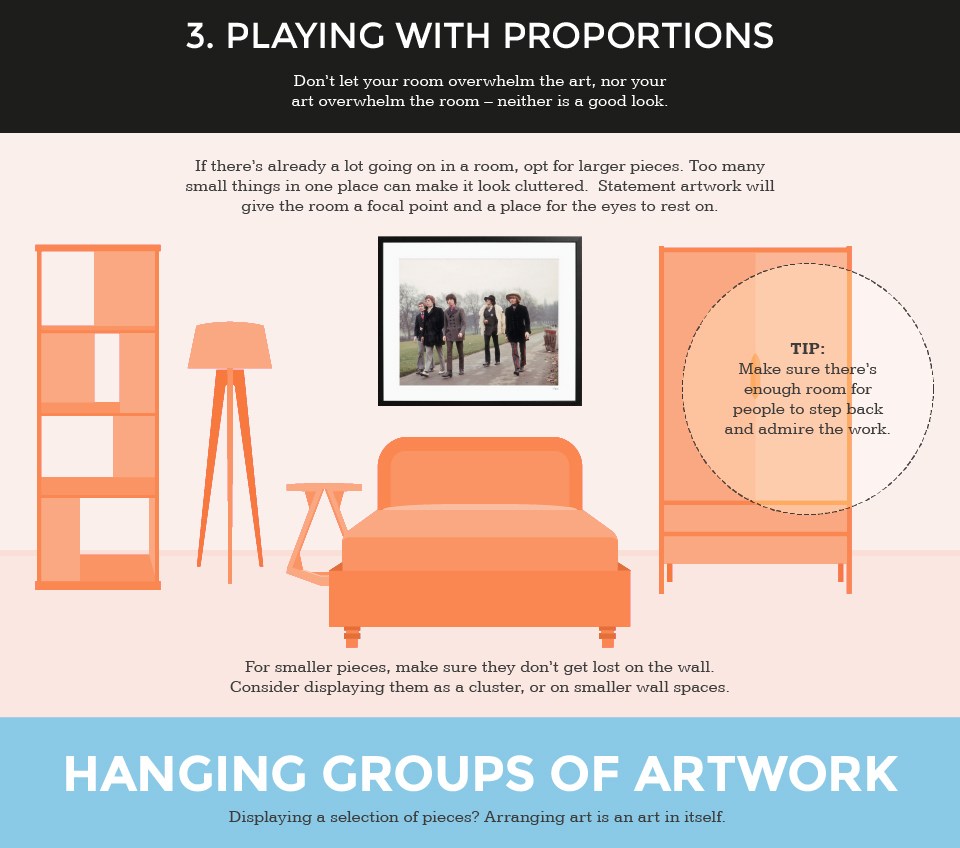
The illustrations below offer some inspiration on working with your room and planning the layout of your artwork. These infographics come from the excellent Made.com blog and are published here under Creative Commons license.
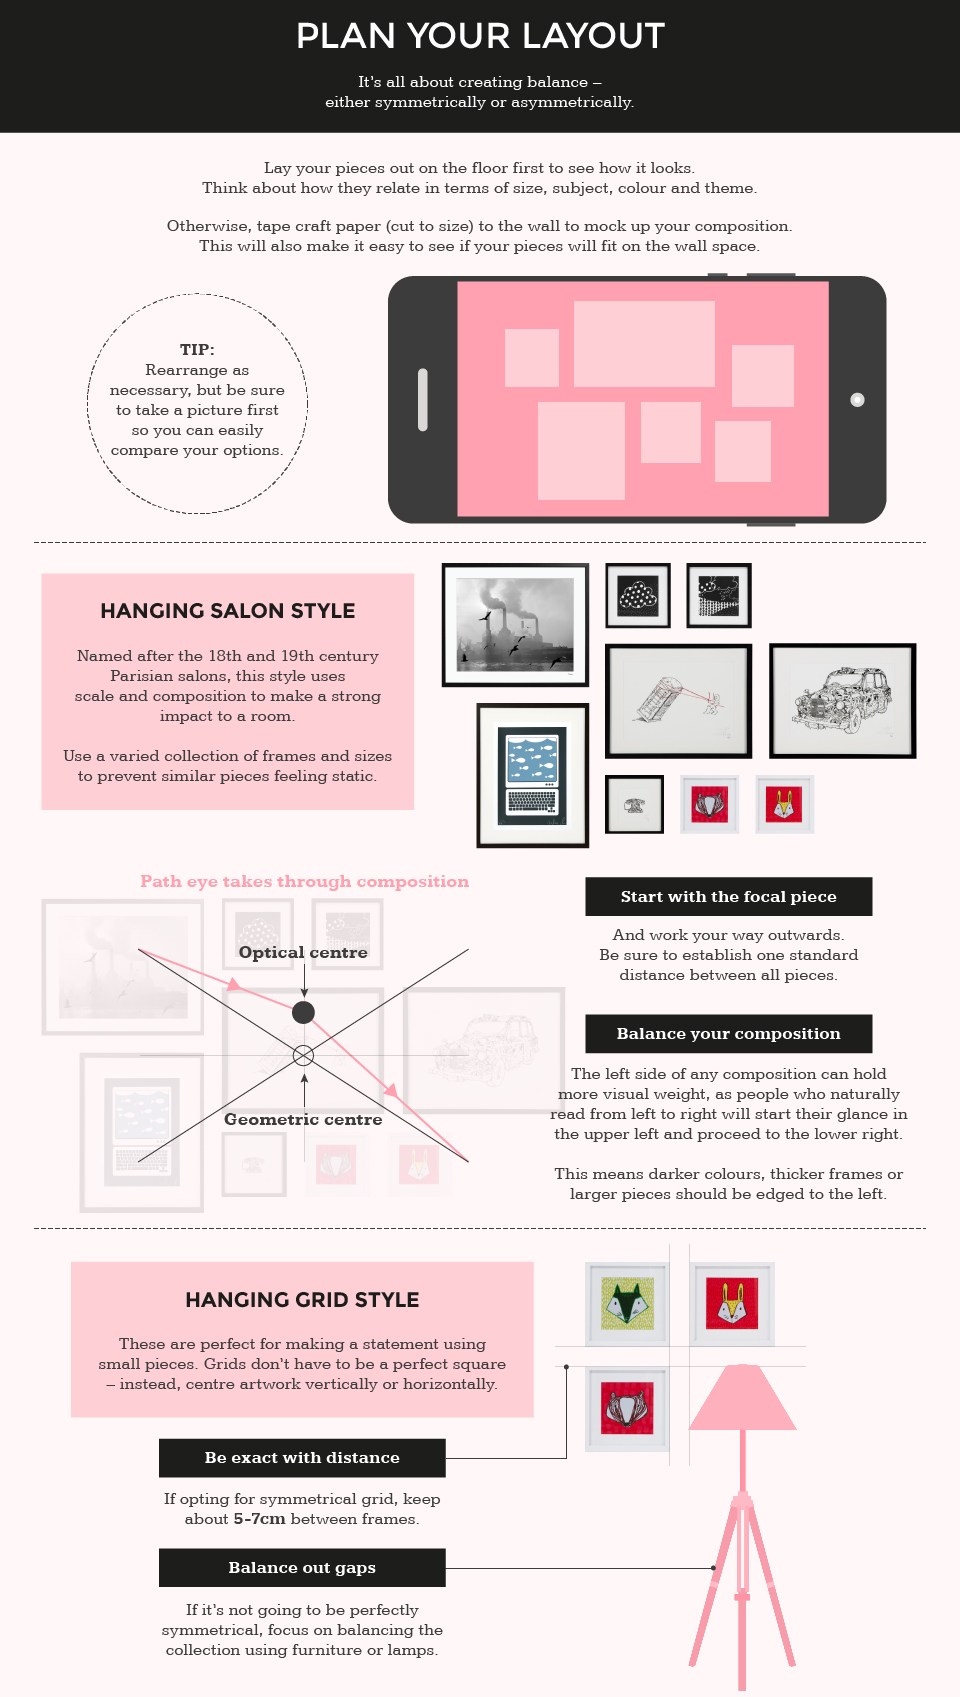
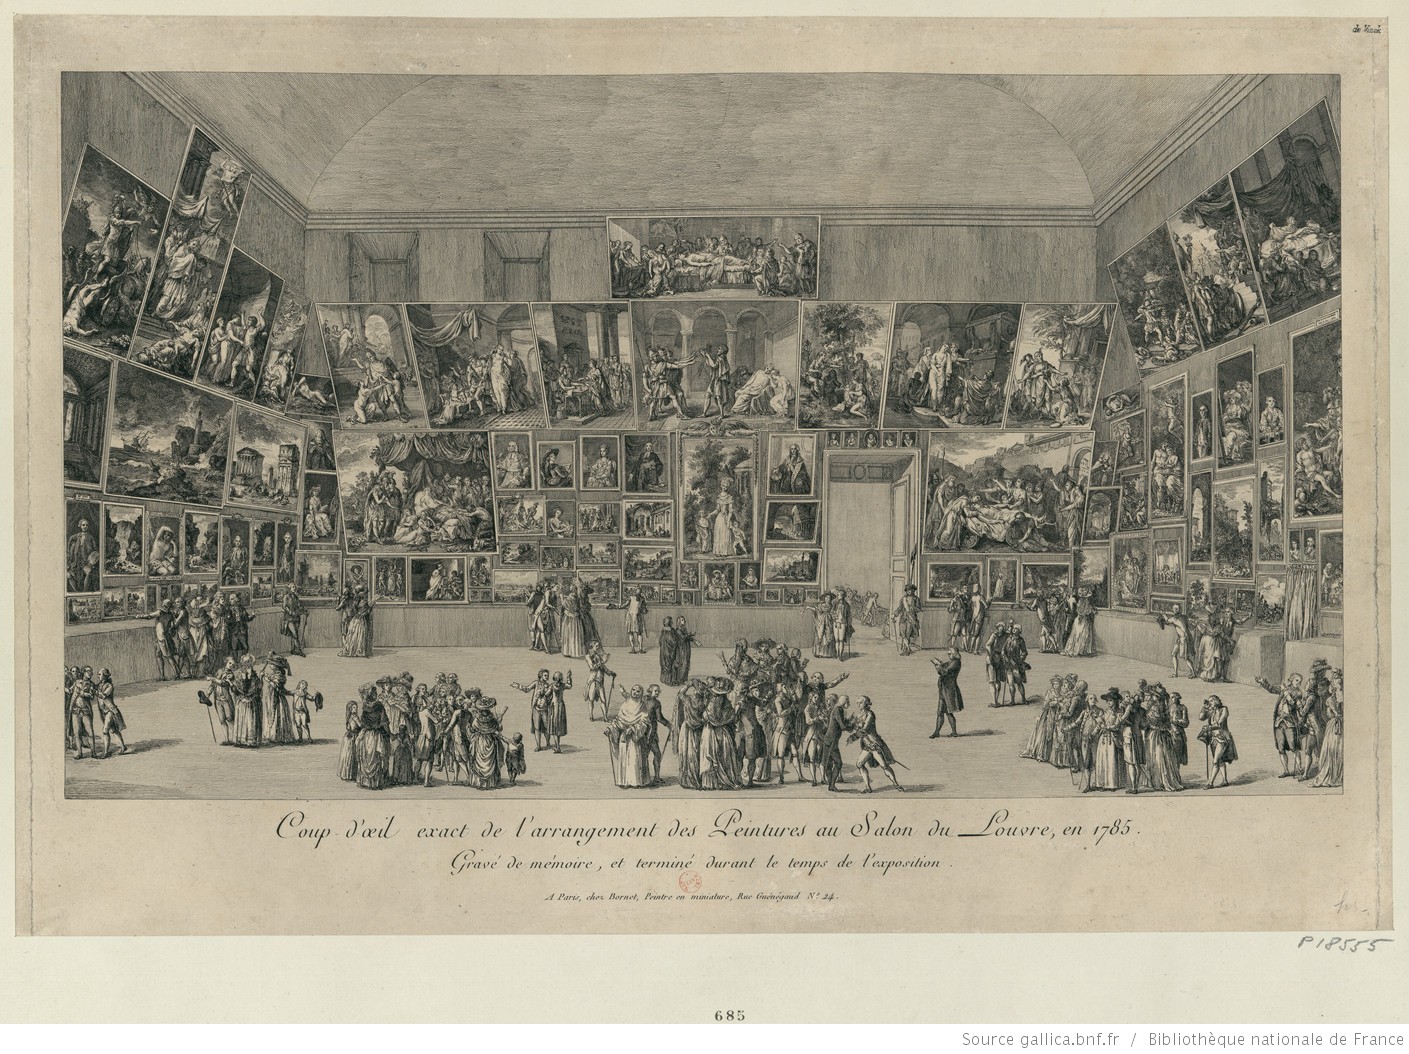
We’re particularly fond of the ‘salon style’ of grouping a collection of pieces, which has its origins in the 18th century practice of showing paintings ‘cornice to wainscot’ (covering the wall from roughly waist-height up to near the ceiling) at expositions and competitions (illustrated here by Martini’s View of the Salon of 1785, an incredible etching where the artist painstakingly reproduces the paintings on display at the exhibition). With this approach it can often be best to plan your layout on the floor before you start making holes in the wall. Or if you are feeling bold, you can simply start by hanging your larger pictures in a satisfying position and work from there with the smaller pieces. If you have a very large collection, you might want a unifying element in each group – similar style frames, or a shared colour, theme or genre – but a wholly random collection can be astonishingly effective. For more inspiration, search Google for ‘Salon Style Hanging’ to see stylish modern takes on this traditional approach.